Create VPN Connection
Create VPN connection
- Access VPC
- Select Site-to-Site VPN Connections
- Select Create VPN Connection

- In the Create VPN Connection interface
- Name tag, enter
VPN - Target Gateway Type: Select VPG
- Virtual Private Gateway: Select VPN Gateway
- Customer Gateway: Existing
- Customer Gateway ID: Select CWG
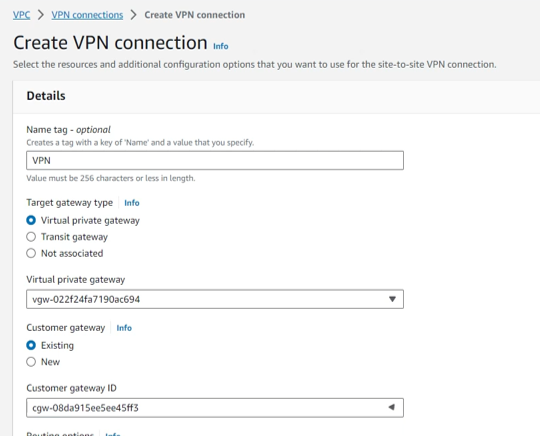
- Continue to perform configuration
- Routing Options: Static
- Static IP Prefixes: 10.12.0.0/16. This is the IP address resolution in the simulated Onpremise environment.
- Other configurations remain the default.
- Select Create VPN Connection

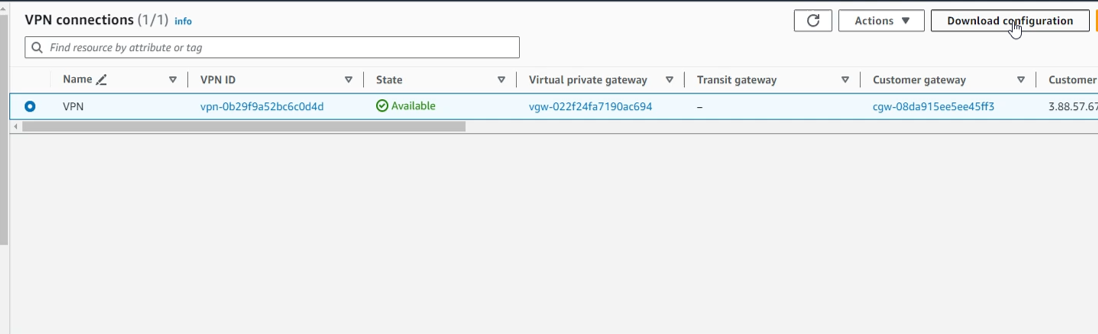
- Complete creating VPN Connection, wait about 5 minutes and the status will change to Available
- Configure propagation for RTB-PrivateSubnet-Consumer*
- In the VPC interface, select Route tables
- Select RTB-PrivateSubnet-Consumer
- Select Route Propagation
- Select Edit propagation route
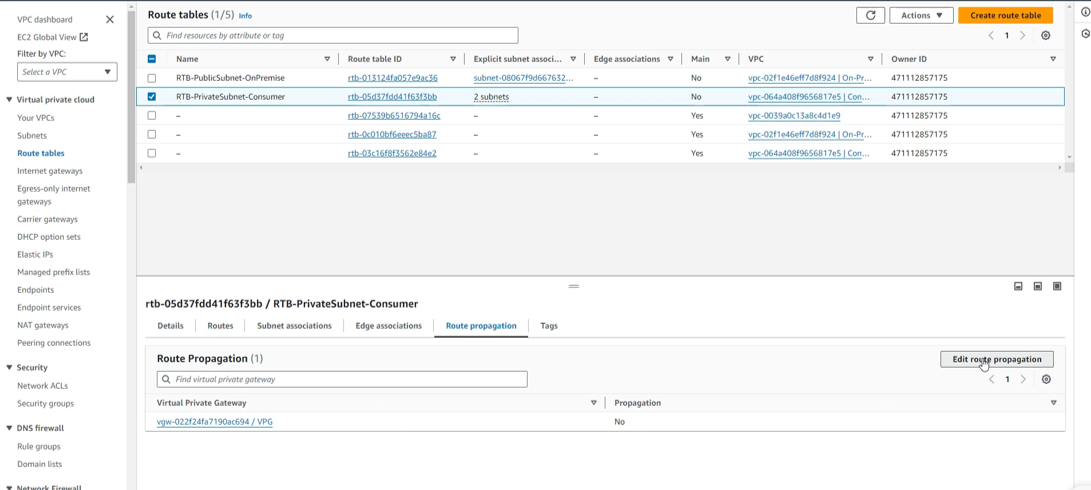
- In the interface Edit route propagation
- Select Enable
- Select Save

- Complete and check again that Route Propagation has changed to Yes
